Happy Halloween!
This weekend Tom and I are invited to a Halloween party. If I wasn’t currently pursuing a career in web and graphic design, I’d most likely be a pastry chef. So, it’ll come as no surprise then that I did some baking for the party. I bring you White Chocolate Chip Cookies, Halloweenified.
Trust me, these cookies are really something else.
Let me show you how to make them.
Assemble your baking supplies. I don’t have any fancy tools, like a Kitchen Aid (oh, one could dream). My little red hand mixer gets me pretty far though.
Measure your sugar and butter, then whip it together.
Once combined, add eggs and vanilla and mix for a little bit until smooth. Then add your dry ingredients and mix again.
Tip: I use both vanilla extract (liquid) and throw in about a teaspoon of pure vanilla powder for good measure. You could add a teaspoon of cinnamon too, or even pumpkin pie spice for a hint of fall.
You don’t have to be too fussy about how you chop the chocolate, odd chunks will do.
Tip: If you’re not Halloweenifying your cookies (in other words, omitting the Reese’s Pieces and sprinkles) then add a bit more white chocolate to your recipe. About 550 grams (20 ounces) of white chocolate should do.
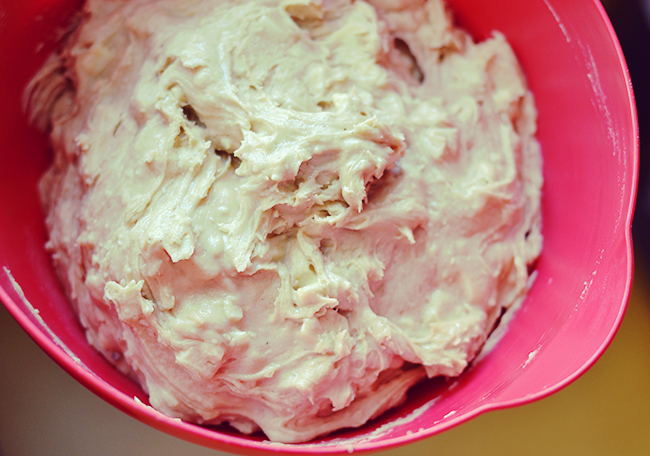
Transfer all your chocolate to the mixing bowl and use a spatula to fold it all into the dough.
Now you’ve got to practice that patience of yours while you let the dough rest in the fridge (cover the bowl with cling film) for 24 to 36 hours. Try to keep your fingers (or boyfriends, children’s, husbands fingers) out of the bowl while it rests.
Once it’s time to finally bake your cookies, prepare your Halloween toppings. I used orange sprinkles and Reese’s pieces.
Roll about a tablespoon worth of dough into a ball, then roll half of it in the sprinkles before placing them on a parchment paper clad baking tray. Make sure you give them space so they don’t all morph into one big cookie when you bake them (then again, that might not be a bad thing…)
I made some just plain with no toppings, and some I pressed 3 to 5 orange and yellow Reese’s Pieces into.
Orange you glad I shared this recipe with you?
Recipe
Yields: about 36 cookies
Prep time: 30 minutes
Chill time: 24-36 hours
In the oven: 7-8 minutes
- 1 cup butter, softened (about 200g / 7 oz)
- 1 cup light brown muscovado sugar
- 1/2 cup granulated sugar
- 3 large eggs
- 1 1/2 Tablespoon (liquid) vanilla extract
- 1 teaspoon pure vanilla powder
- 1 teaspoon cinnamon, optional
- 1 teaspoon salt
- 1 teaspoon baking soda
- 1 teaspoon baking powder
- 2 1/2 cups flour
- 2 1/2 – 3 cups (about 550g / 20 oz) chopped white chocolate
- Reese’s Pieces
- Orange hundreds and thousands sprinkles
Here’s what you do:
- Start by mixing together the softened butter and both sugars for a couple of minutes until completely combined and no lumps of butter remain.
- Add in the eggs, vanilla extract, pure vanilla powder and (if using) cinnamon and mix again. Turn the speed up and mix for about half a minute until you’ve got a smooth batter.
- Add salt, baking soda, baking powder and flour and mix again. The batter will become rather heavy now, mix until everything is combined.
- Add your chopped white chocolate and use a spatula to fold the pieces into the dough.
- Cover the bowl with cling film and let rest in the fridge for 24 to 36 hours.
- Fast forward 24 (to 36) hours and preheat your oven to 190°C / 365°F.
- Prepare a baking sheet with parchment paper and pour your sprinkles into a small dish.
- Roll about 1 tablespoon worth of dough into an even ball, then roll one side of each ball in your dish of sprinkles. Alternatively, press 3-5 Reese’s Pieces into the top of the ball.
- Place on baking sheet. Make sure you give the dough balls some space so they don’t melt into each other when you bake (8-10cm / 2-3 inches apart should keep you safe).
- Bake for 7-8 minutes. I usually set my timer for 7 minutes and once it goes off, I keep an eye on the cookies in the oven until I see the edges have just started to brown. They’ll keep baking a little bit once they’re out of the oven, so you want them slightly under baked for that perfect soft cookie.
- Once out of the oven, let them sit on the baking tray for a couple of minutes, then transfer them to a wire rack.
Adapted from Cookies & Cups


